Table of Contents
- Ensuring a Smooth Installation Experience
- 1. Salesforce Account with Administrative Privileges
- 2. Compatibility with Salesforce Editions
- Fully Compatible Editions for Revecast Connect
- 3. Backup of Your Salesforce Data
- How to Prepare for Revecast Connect Installation from Salesforce AppExchange
- Post-Installation Setup Steps
- Verify Installation
- Integration Time!
Revecast Connect is designed with user-friendliness and seamless integration in mind. Our team is committed to providing comprehensive support to ensure your satisfaction. By following this download guide, you can confidently locate Revecast Connect on the Salesforce AppExchange and install to begin experiencing the benefits of enhanced connectivity and streamlined processes within your Salesforce platform.
For any further assistance or detailed configuration help, please do not hesitate to reach out to our dedicated support team. We are here to ensure your success and to help you maximize the potential of Revecast Connect in your organization.
Ensuring a Smooth Installation Experience
Before you begin, ensure you meet the following prerequisites:
1. Salesforce Account with Administrative Privileges
To install an app from the Salesforce AppExchange, you need to have administrative privileges. This ensures that you have the necessary permissions to make changes to your Salesforce environment, including installing new applications and configuring settings.
2. Compatibility with Salesforce Editions
Salesforce offers multiple editions to cater to a diverse range of businesses. Before downloading any Salesforce AppExchange apps, it’s crucial to verify compatibility. Revecast Connect is compatible with the following editions:
Fully Compatible Editions for Revecast Connect
- Enterprise Edition
- Unlimited Edition
- Developer Edition
- Performance Edition
- Professional Edition* requires additonal API Access Add-On. To ensure Revecast Connect is fully functional in the Professional Edition, administrators need a purchase to enable integrations with external systems and services using Salesforce APIs. Pleae contact your Salesforce Account Executive (AE) to determine the best options for your business.
By ensuring compatibility with these editions, Revecast Connect provides a seamless and powerful integration experience across different Salesforce environments.
3. Backup of Your Salesforce Data
Backing up your Salesforce data is a crucial step before installing any new application. This precautionary measure ensures that you have a restore point in case anything goes wrong during the installation process. Salesforce provides native tools for data backup, such as the Data Export Service, which allows you to schedule weekly or monthly exports of your data. Additionally, consider using a third-party backup solution like, OwnData for more comprehensive data protection. Having a recent backup helps protect your data integrity and ensures business continuity, this becomes even more important as you build robust integrations to your other systems.
How to Prepare for Revecast Connect Installation from Salesforce AppExchange
Step 1: Access Salesforce AppExchange
- Navigate to Salesforce AppExchange.
Step 2: Search for Revecast Connect
- On the AppExchange homepage, use the search bar at the top.
- Type “Revecast Connect” and press Enter.
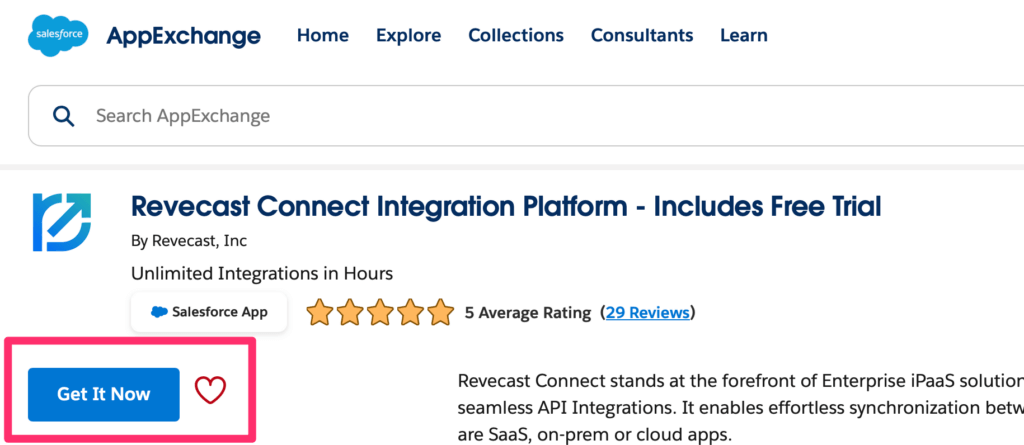
- From the search results, click on the Revecast Connect listing.
Step 3: Review App Details
- Read through the app details, including the description, features, and pricing information.
- Check the system requirements and installation notes to ensure compatibility with your Salesforce environment.
Step 4: Initiate the Process
- Click on the “Get It Now” button on the Revecast Connect listing page.
- You will be prompted to log in to your Salesforce account if you haven’t already.

Step 5: Email Confirmation and Booking Installation
- After initiating the download, you will receive an email with a Calendly link.
- Use this link to book a time for our custom white-glove installation service. We are committed to providing personalized service to ensure your setup is seamless.
Post-Installation Setup Steps
Once the installation is completed by our team, we will assit you with the following:
- Assign permissions to users and profiles as needed.
- Configure the app according to your organizational requirements..
Verify Installation
- Go to the App Launcher.
- Search for Revecast Connect and open it.
- Ensure that the app is functioning correctly and all components are accessible.
Integration Time!
Revecast Connect is designed to streamline your business operations through seamless integrations. By following this guide and utilizing our white-glove installation service, you can ensure a smooth setup and begin experiencing the full benefits of Revecast Connect. For any additional support or detailed configuration help, our dedicated support team is always here to assist you.
Thank you for choosing Revecast Connect. We are excited to see what you will accomplish with our integration tools.


